ownCloud Setup Guide
 This article is over six months old. Which means the information below may be out of date. Please keep this in mind whilst reading this article.
ownCloud is a superb cloud syncing service that you can run on your own hardware. With the recent release of ownCloud version 5 this seemed like the perfect time to publish an ownCloud setup guide for you guys to follow, we hope you enjoy it.
Setting up an ownCloud server isn’t the easiest process to do so I wouldn’t recommend any one to undertake this unless you are using a spare machine that you don’t mind completely breaking (in terms of software) or if you are not comfortable in a Linux command shell. Whilst I’ve tried to make this ownCloud setup guide as easy to follow as possible, it does assume a certain level of knowledge. So let’s get started…
What you need
Ok, first things first. Let’s look at what you will need in order to get your ownCloud server up and running. There are a number of things you need, namely the hardware required. Here is a full list:
- A spare machine to install ownCloud on.
- Enough hard drive space to fit all of your cloud files and the operating system.
- A good quality internet connection (so that syncing is quicker – this isn’t a requirement but it helps).
- A cabled internet connection – again, this isn’t a requirement but it will speed things up considerably over wireless.
- A usb stick/CD pre-loaded with Ubuntu Server Edition. I would recommend 12.04 LTS x64.
- Access to your firewall/router to make changes to the rulebase.
Install Ubuntu Server on you machine
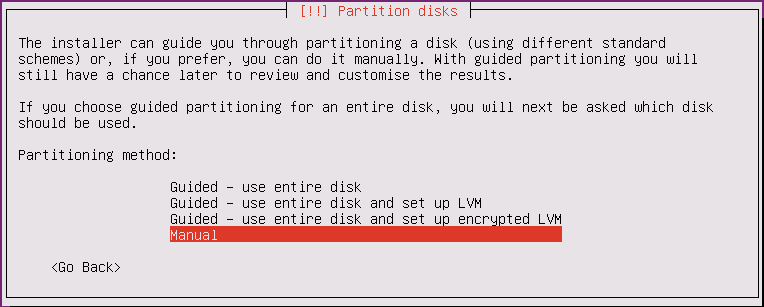
Ok, we now have everything we need to get started. We’ll start by setting up ownCloud on the machine. Please note: this ownCloud setup guide assumes you will be using your machine only as an ownCloud server so all data will be wiped from the machine. I’m not going to give you step by step instructions on how to install the operating system, however this guide may help if you’re unsure. Simply follow the on screen prompts until you are asked to setup the partitions on your hard drive. Once you get to the point of setting up your partitions you will need to set it up as follows:
- A 10GB EXT4 partition mounted as / (root). This will be for the operating system and boot record. It needs to be made bootable.
- A SWAP partition. The size of this will change depending on the amount of RAM you have. If you have more than 4GB then I wouldn’t say you need a SWAP partition. If you have 2GB RAM, then setup a 2GB SWAP partition, if you 1GB RAM then setup 3GB SWAP etc…
- An EXT4 partition mounted as /var. This will take up the rest of your storage space as this is where ownCloud will store all your data.
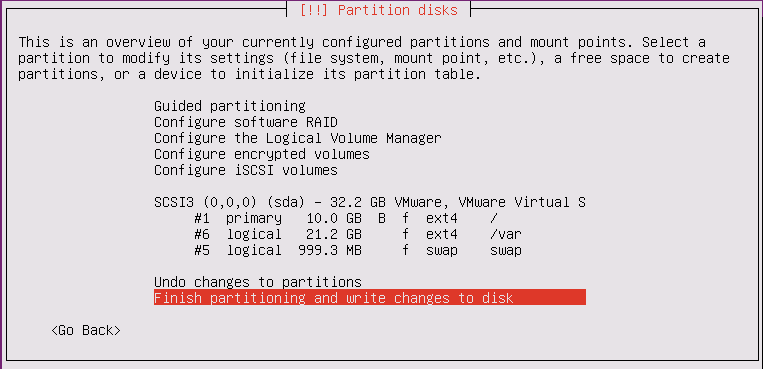
- Ensure that all partitions have the format flag checked.
Once done, your partition window during Ubuntu Server setup will look something like below. Please note that these screenshots are taken on a virtual machine so the /var partition size will probably be a lot smaller than what you will have.
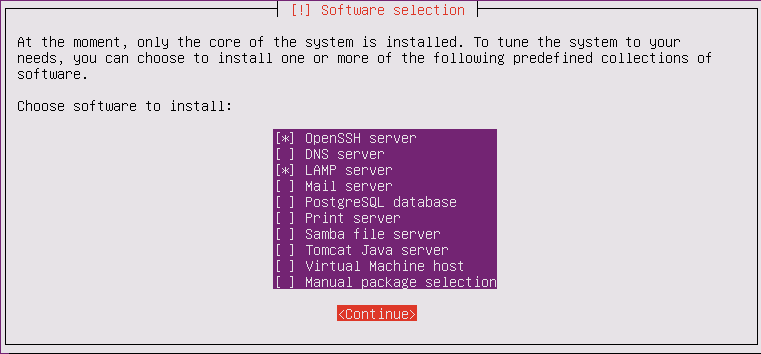
Once the base installation of Ubuntu Server is installed you will be asked to configure roles on the server. This is done by using the up/down arrows and using the space bar to select a role. You need to select OpenSSH & LAMP (Linux, Apache, MySQL & PHP) as per the screenshot below:
At this point you will be asked to set a root password for MySQL. It is very important that you remember this password as you will need it later. For security reasons I would recommend that you set a different password to your user password. That’s it, you should now have a working Ubuntu Server. From here on you can connect to the servers command line interface via SSH using an application like PuTTY, just run an ifconfig on the server to get it’s IP address. So let’s move on to the next step.
Install Webmin
Now we’re going to install Webmin on our server. The reason I’ve added this to the ownCloud setup guide is because Webmin gives you an easy to use web interface so that you can easily manage your server from your browser. I personally love this application as this coupled with SSH access gives you fantastic control over your machine. Installing Webmin is extremely easy, just run the three commands below (the first command installs some pre-requisites required for Webmin to work).
- sudo apt-get install perl libnet-ssleay-perl libauthen-pam-perl libpam-runtime libio-pty-perl apt-show-versions python
- wget http://prdownloads.sourceforge.net/webadmin/webmin_1.620_all.deb
- sudo dpkg –install webmin_1.620_all.deb
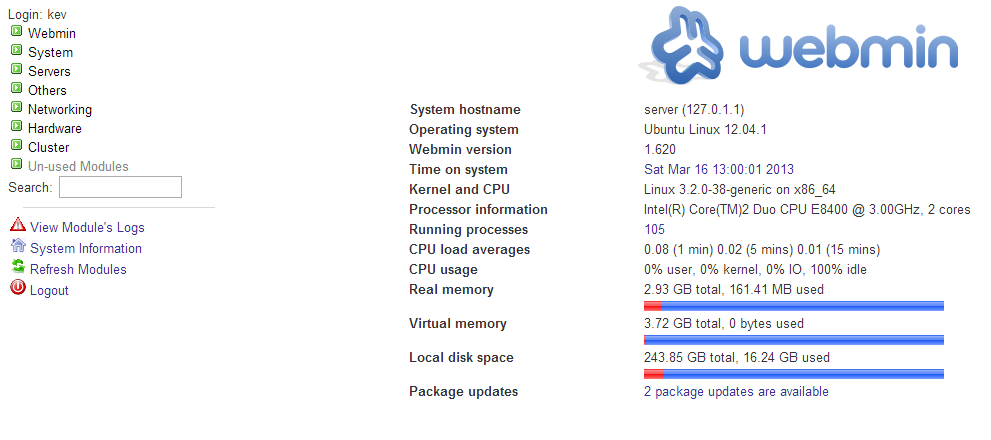
Once Webmin is setup you can connect to it using https://ip_address:10000, you will then be asked to login. For this, use your local user account credentials that you setup during the Ubuntu Server setup process. Once logged in you will see a screen similar to the one below. Webmin is now setup and you will be able to manage your server through your web browser as well as via SSH.
Installing ownCloud
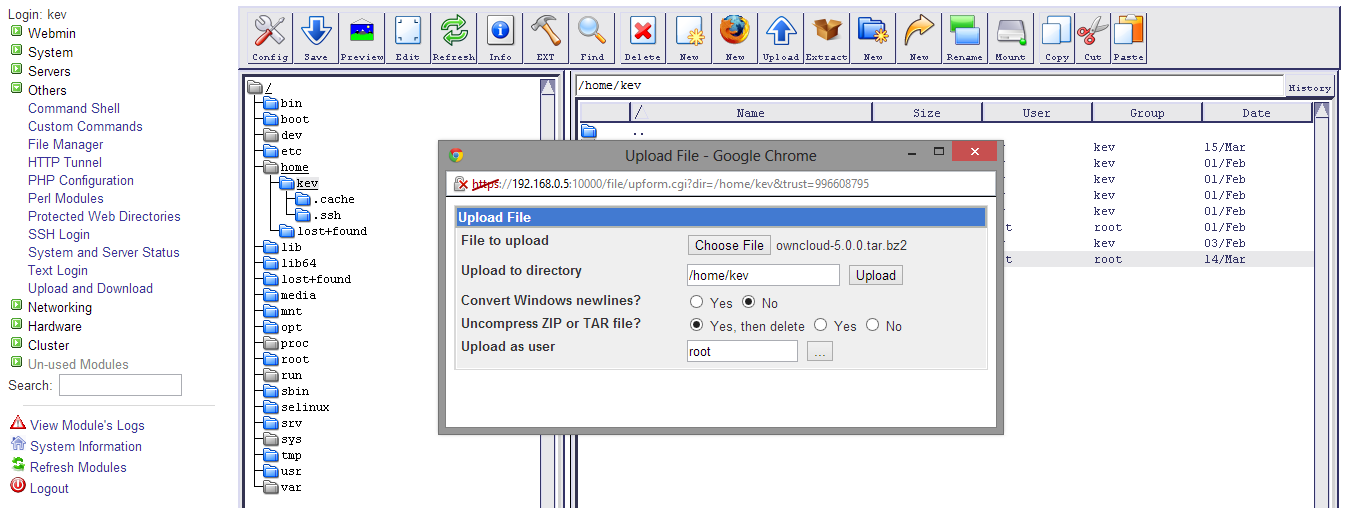
Now we’re ready to install ownCloud. This is a very simple process. All you need to do is download the compressed file, extract it to your home folder and then move it to /var/www. You can do this by command line or via Webmin. You can download the ownCloud version 5 package from here, then upload it, extract and move within Webmin. Or you can run the commands below via SSH.
- wget http://owncloud.org/releases/owncloud-5.0.0.tar.bz2
- tar -xvf owncloud-5.0.0.tar.bz2
- sudo mv owncloud /var/www/owncloud
- sudo chown -R www-data:www-data /var/www/owncloud
- sudo /etc/init.d/apache2 restart
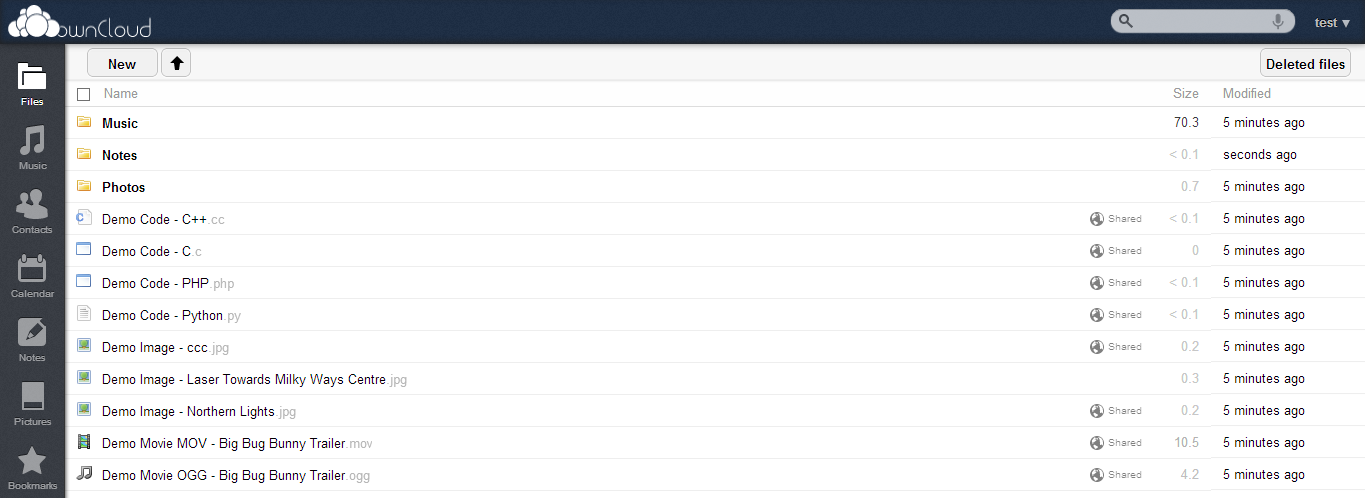
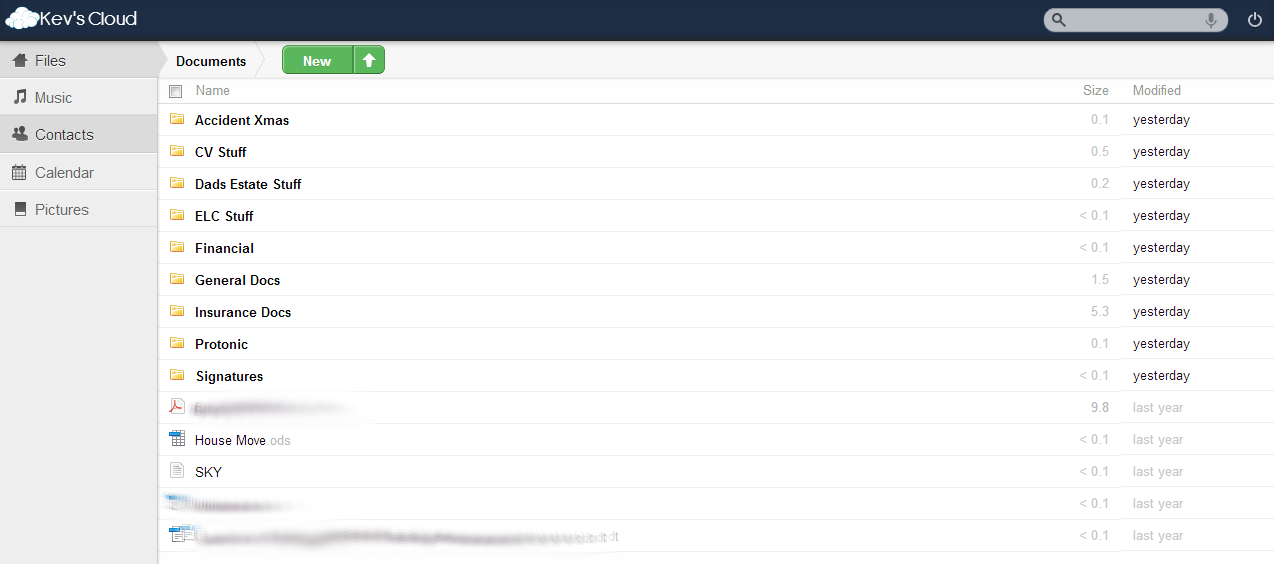
Once that’s done you should be able to navigate to http://ip_address/owncloud and you will be confronted with the ownCloud configuration screen. All you need to do here is setup an admin account, give your SQL database a name (I would suggest something simple like owncloud), set the location of your data (default is /var/owncloud/data – you can change this if you wish) and insert your MySQL root username and password that you entered during the Ubuntu Installation earlier. You will then be logged in and ownCloud is setup successfully What we need to do now is configure ownCloud to be more secure and also setup public assess to the server from the Internet.
Configuring ownCloud
Now that you’ve followed our ownCloud setup guide you need to configure your ownCloud instance so that you have users, quota’s and also big files. Big files should be setup if you wish to sync large files like movies. This is simple to do, you can follow this guide and use Webmin to download, edit, and upload the PHP.ini file to your needs.
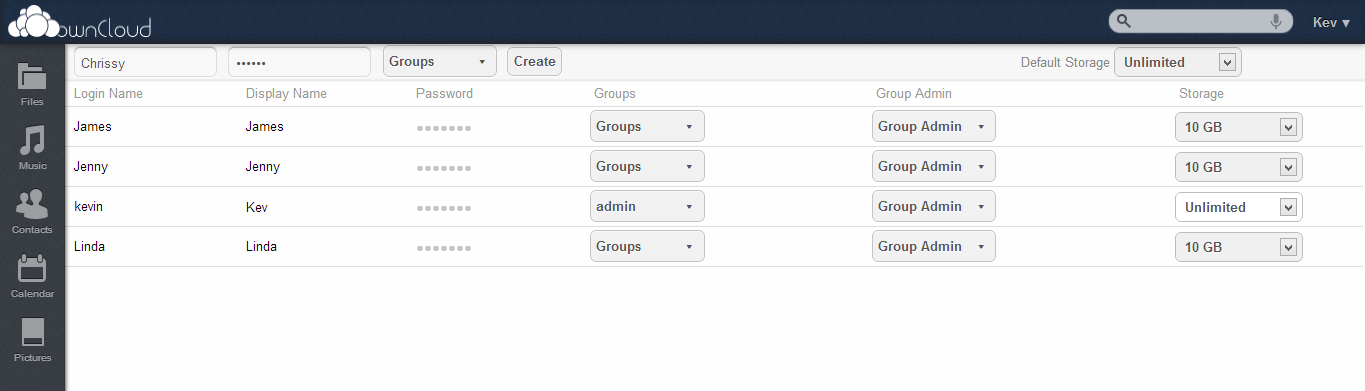
Now you need to setup your users and their quotas. To do this, click on your username in the top right hand corner and select Users from the dropdown menu. You can then configure your users and their quotas very easily. Here is a screenshot from my ownCloud server:
At the moment the new local encryption isn’t really supported in ownCloud 5, but it is set to come by April. For now though, you can always encrypt the entire hard drive using a tool like TrueCrypt. From here on, I would suggest that the best way to get to know ownCloud is to explore, the GUI is extremely well made and easy to use. Most users will work out how to do things within a matter of minutes. If you get stuck, then there is always the ownCloud community forums who have been very helpful for me in the past.
Configuring your Firewall & Network Card
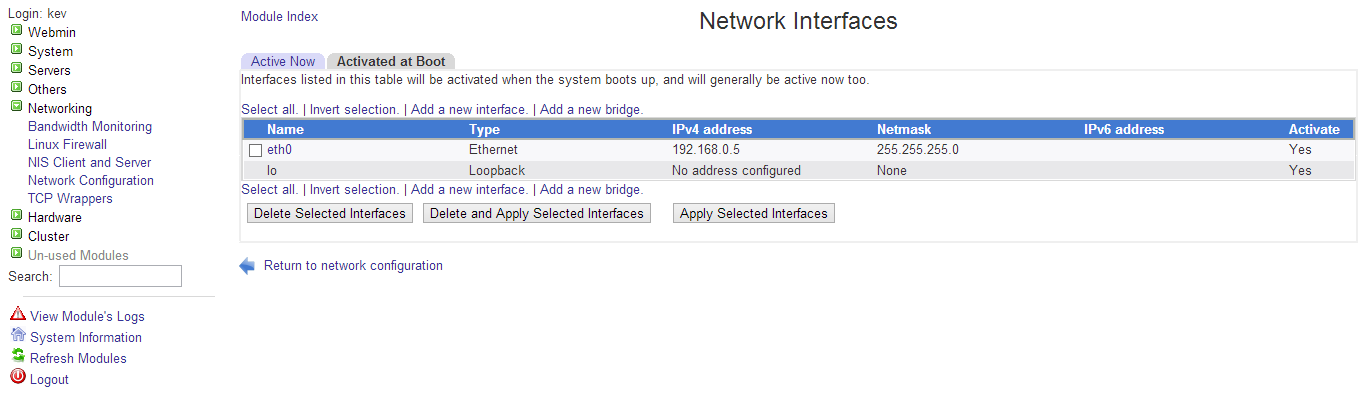
You need to give your server a static IP address. This will ensure that if you ever need to reboot your ownCloud server, it will always keep the same IP address and your NAT rules will always work. The easiest way of doing this is through Webmin. To do this go to Networking > Network Configuration > Network Interfaces. You will then see a screen a lot like this:
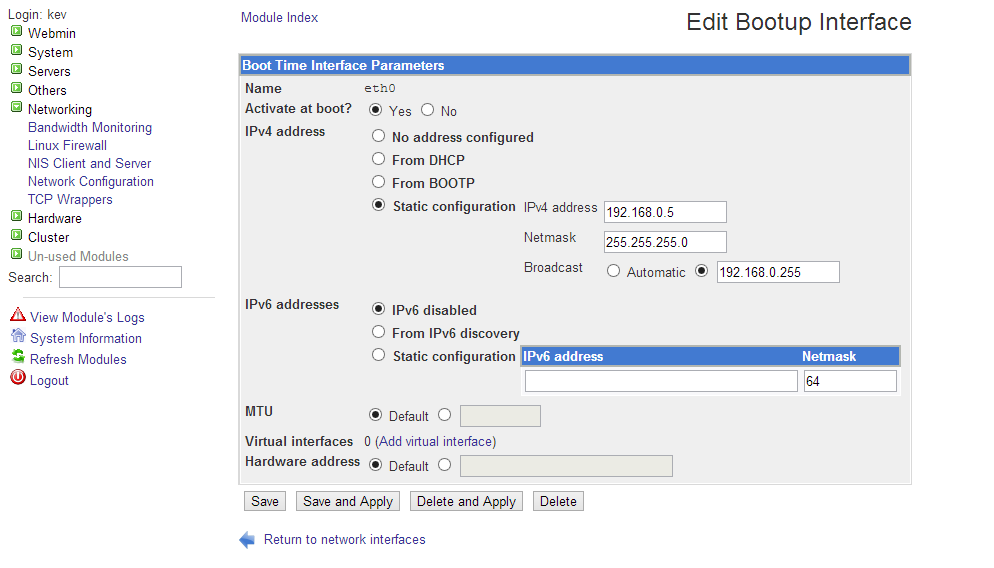
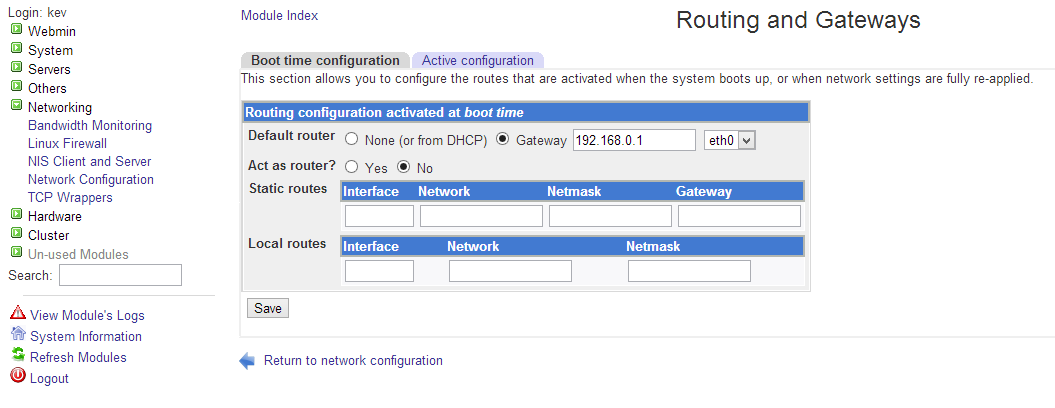
Now you need to click on the eth0 interface to configure it. You need to select Static configuration and then give your machine an IP address and subnet mask, once complete, click the Save and Apply button. You now need to configure routing on the server, to do this click on Network Configuration on the left tree again and select Routing and Gateways. Select the Gateway checkbox and put the IP address of your router in here. Click Save and your network and routing configuration is now complete. Here is a couple of completed screenshots so you know what to look for:
In order to allow remote admin and access to your server from the internet you need to give your server a static IP address and also NAT four ports to your server. These ports are 80 (HTTP), 443 (HTTPS), 22 (SSH) & 10000 (Webmin), setting up NAT on these ports will mean that all incoming traffic on these ports will automatically get passed to your server. If you don’t have these rules in place then your firewall won’t know what to do with the traffic and will drop it. Obviously I can’t provide a guide on every single router/firewall out there so I would expect you guys to work this out for yourselves. However, if you do need help Port Forward have guides on configuring most common firewall routers.
That’s the network configuration complete. I would then recommend to setup a sub-domain for your ownCloud server (provided you own an internet domain). If you don’t have a static public IP address then you can use a service like DynDNS to keep on top of your ever changing public IP address, this will also give you a domain name if you don’t have one. To test it’s all working try navigating to your DynDNS domain from your mobile phone when it’s not connected to Wi-Fi, this will come from outside your network and prove it’s all working. Finally we’re going to secure our ownCloud server…
Configuring HTTPS
Thanks to our ownCloud setup guide we now have a working ownCloud server. But we need to secure it as HTTP traffic isn’t encrypted, so it means that all your data is transmitted in plain text. In this final section we’re going to configure an encrypted HTTPS connection and re-direct HTTP to this so that all connections to ownCloud are always encrypted and secure. Let’s take a look…
First of all we need to tell Apache (our web server) to start listening on port 443 (HTTPS). To do this run the following commands:
- sudo su
- a2enmod ssl
- /etc/init.d/apache2 restart
- netstat -tap | grep https
The final command should give you an output that looks something like the example below. This means that Apache is now successfully configured to listen on port 443.
root@server1:~# netstat -tap | grep https
tcp6 0 0 [::]:https [::]:* LISTEN 1238/apache2
root@server1:~#
Now we’re going to setup the SSL virtual host to work with our ownCloud instance. Apache comes with a default SSL vhost configuration in the file /etc/apache2/sites-available/default-ssl. We use that file as a template for the ownCloud vhost…
- cp /etc/apache2/sites-available/default-ssl /etc/apache2/sites-available/ownCloud-ssl
- vi /etc/apache2/sites-available/ownCloud-ssl
Make sure you use the correct IP address in the <VirtualHost xxx.xxx.xxx.xxx:443> line (192.168.0.5 for example); Also fill in the correct ServerAdmin email address and add the ServerName line. Adjust the paths in the DocumentRoot line and in the <Directory> directives, if necessary.
This vhost uses the default self-signed snakeoil certificate that comes with Ubuntu/Debian. That’s fine as it’s just as good as any other self-signed certificate. You can sign your own, or even import one from a certificate authority so you don’t get any SSL prompts but I’m not going to cover that in this ownCloud setup guide as it’s doesn’t add any value for us really. Finally we need to disable the default SSL host and enable our ownCloud host as the default instance. Here’s how…
- a2dissite default-ssl
- a2ensite ownCloud-ssl
- /etc/init.d/apache2 reload
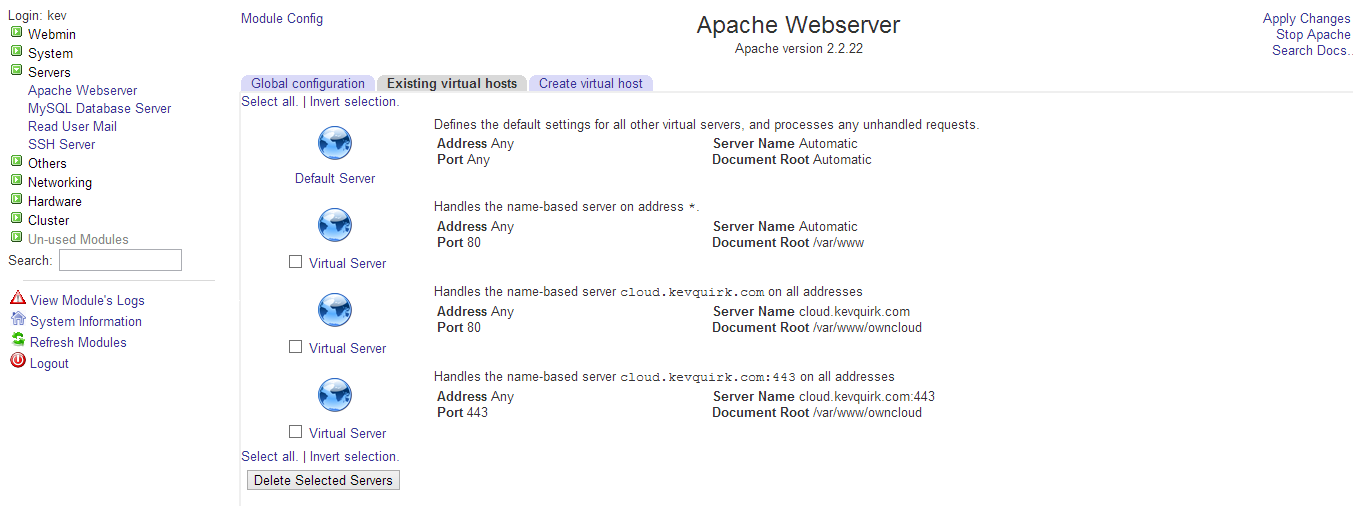
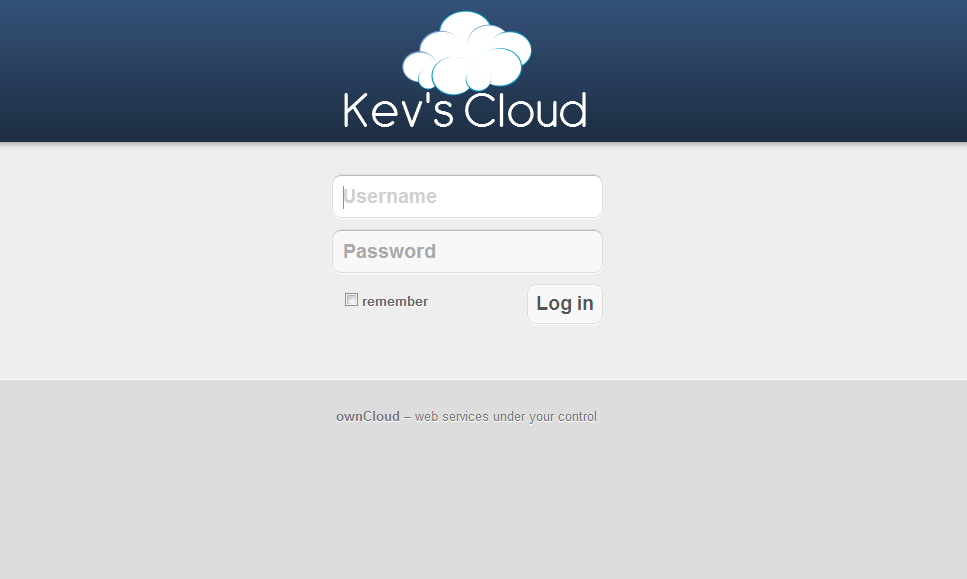
Now you should be able to go to https://ip_address/ownCloud and you will be prompted about the self-signed certificate. To see an example a working version go to https://cloud.kevquirk.com (this is the public address for my server). Now we need to tell Apache to automatically forward all HTTP traffic to HTTPS so that all ownCloud sessions are encrypted and secure. To do this, head over to Webmin and go to Servers > Apache Web Server. You need to have two virtual servers for your ownCloud server, one on HTTP port 80 and the other on HTTPS port 443 as shown below:
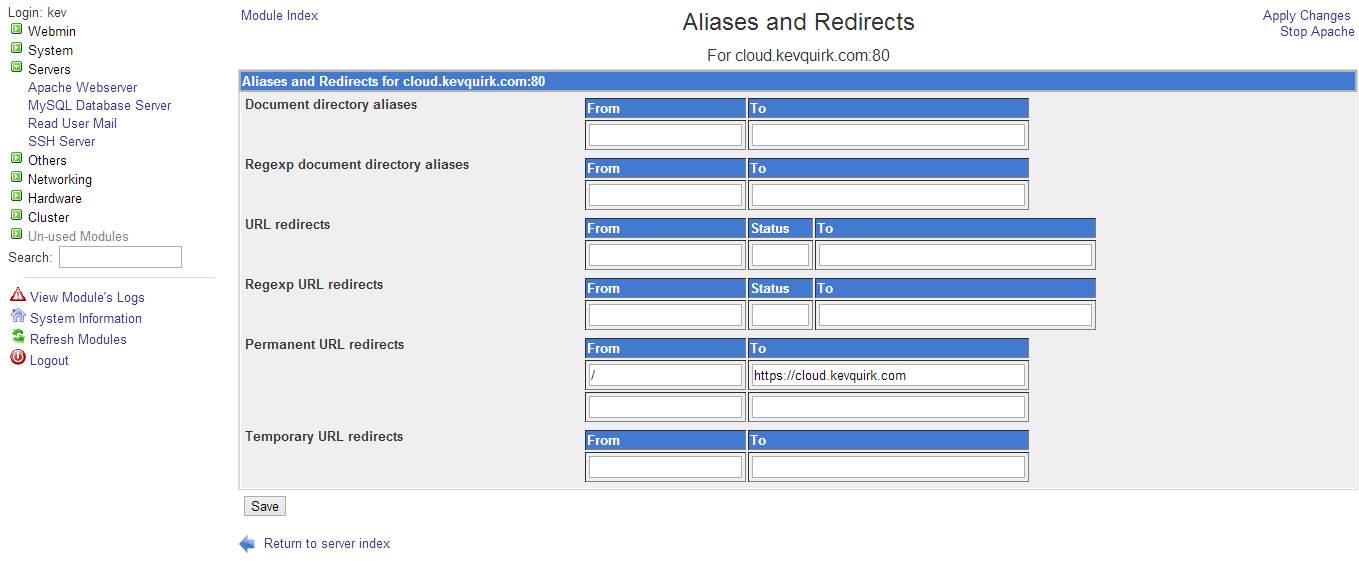
Within the port 80 (HTTP) virtual server, you need to go into Aliases and Redirects and within the Permanent Redirects field you need to enter the HTTPS address of your server. This will ensure that all HTTP traffic is always forwarded on to the encrypted HTTPS session. Here is what it should look like:
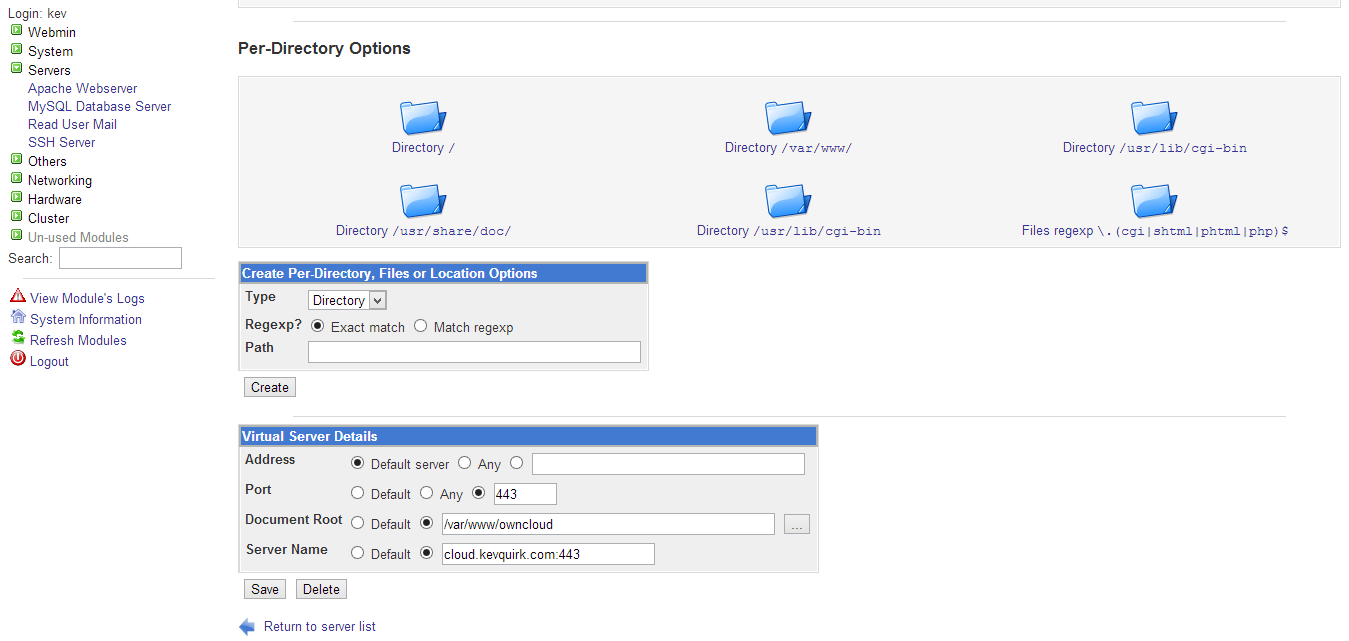
Finally here is a screen shot of my HTTPS virtual server so you can see how that should be configured. Once yours is setup, hit the Apply Changes link at the top right of the screen then the Stop Apache, and Start Apache afterwards. You can test this by navigating to the HTTP address and you should still get the SSL prompt you get before. For a working example head to http://cloud.kevquirk.com.
Install & Configure Client
This is the final step. To setup the client simply download the exe file if you’re running windows from here and install it. You then need to configure the client to work with your server. All you need to do is enter the full URL to your server (for example https://cloud.kevquirk.com), your username and password. Ensure you tick the Used Secure Connection box. You will then get a security warning about your certificate, hit the checkbox at the bottom of the window to continue anyway and click ok. The ownCloud client is now configured and talking to your new server. To install in Ubuntu simply run the commands below:
- sudo su
- echo ‘deb http://download.opensuse.org/repositories/isv:ownCloud:devel/xUbuntu_12.04/ /’ >> /etc/apt/sources.list.d/owncloud-client.list
- wget http://download.opensuse.org/repositories/isv:ownCloud:devel/xUbuntu_12.04/Release.key
- apt-key add – < Release.key
- apt-get update
- apt-get install owncloud-client
- For different version and distro’s take a look here for more information.
Conlusion
That’s it! We’ve come to the end of our ownCloud setup guide. You should now have a secure, private cloud where you have as much storage as you like. ownCloud is a fantastic service that really gives you all the control you need when it comes to running your own cloud server. Like I said earlier in this marathon article, if you need help with ownCloud going forward then you should pop over to the ownCloud forums and ask for help there. Maybe I’ll see you there!
Did you find this guide helpful? If so, remember to sign up for our RSS feed or email newsletter to get more great guides like this straight to your inbox.


Pingback: Three Point Blogging - The Theory | RefuGeeks
Pingback: Instalar Owncloud en Ubuntu 12.04 LTS | Paco Rabadán
Pingback: Install command not working | Ubuntu InfoUbuntu Info
Pingback: Ubuntu server 12.04 – Cannot connect through public IPQueryBy | QueryBy, ejjuit, query, query by, queryby.com, android doubt, ios question, sql query, sqlite query, nodejsquery, dns query, update query, insert query, kony, mobilesecurity, postquery,